Another fairly popular set of entities are various switchers. Let's consider a couple of different switchers shown below:
Let's look at their HTML code:
<!-- Switcher 1: Classic Toggle Switch -->
<div class="mb-4">
    <h5>Classic Toggle Switch</h5>
    <label class="switch">
        <input type="checkbox">
        <span class="slider round"></span>
    </label>
</div>

<!-- Switcher 2: Button Toggle -->
<div class="mb-4">
    <h5>Button Toggle</h5>
    <button id="toggleBtn" class="toggle-btn off">Off</button>
</div>
Since the switchers are different – the first is a classic toggle switch, and the second is a button that changes color and text – it is not possible to describe them with a single class.
However, as in the previous example with the carousel, we have an abstract class AbstractSwitcher which makes it easy to describe switchers of any type.
We will create a separate class for each switcher and override 4 main abstract methods:
getState()toggle()switchOn()switchOff()
This way, each will use its own logic but have one interface through which the framework reads actions and builds the report.
Class - ClassicToggleSwitcher
public class ClassicToggleSwitcher extends AbstractSwitcher {
    public ClassicToggleSwitcher(String selenideLocator) {
        super(selenideLocator);
    }

    @Override
    public boolean getState() {
        return getRoot().$("input").isSelected();
    }

    @Override
    public void toggle() {
        getRoot().click();
    }

    @Override
    public void switchOn() {
        if (!getState()) {
            getRoot().click();
        }
    }

    @Override
    public void switchOff() {
        if (getState()) {
            getRoot().click();
        }
    }
}
Class - ButtonToggle
public class ButtonToggle extends AbstractSwitcher {
    public ButtonToggle(String selenideLocator) {
        super(selenideLocator);
    }

    @Override
    public boolean getState() {
        return getRoot().has(Condition.cssClass("off"));
    }

    @Override
    public void toggle() {
        getRoot().click();
    }

    @Override
    public void switchOn() {
        if (getState()) {
            getRoot().click();
        }
    }

    @Override
    public void switchOff() {
        if (!getState()) {
            getRoot().click();
        }
    }
}
Adding Switchers to the Page Object
@PageObject
@Getter
@Accessors(fluent = true)
public class SwitcherPage {

    @Name("CTU")
    protected ClassicToggleSwitcher classicToggleSwitcher = new ClassicToggleSwitcher(".switch");

    @Name("SBT")
    protected ButtonToggle buttonToggle = new ButtonToggle("#toggleBtn");
}
Test Scenario
@Test
@DisplayName("Switcher (Toggle) example")
public void switcherExample() {
    UiSteps.openBrowser(switcherPageUrl);
    carouselPage.classicToggleSwitcher().switchOn();
    carouselPage.classicToggleSwitcher().switchOff();
    carouselPage.classicToggleSwitcher().toggle();
    carouselPage.classicToggleSwitcher().switchOff();
    carouselPage.buttonToggle().switchOn();
    carouselPage.buttonToggle().switchOff();
    carouselPage.buttonToggle().toggle();
    carouselPage.buttonToggle().switchOff();
}
Run the test and check the report – all steps used are recorded in the report with the corresponding names and types.
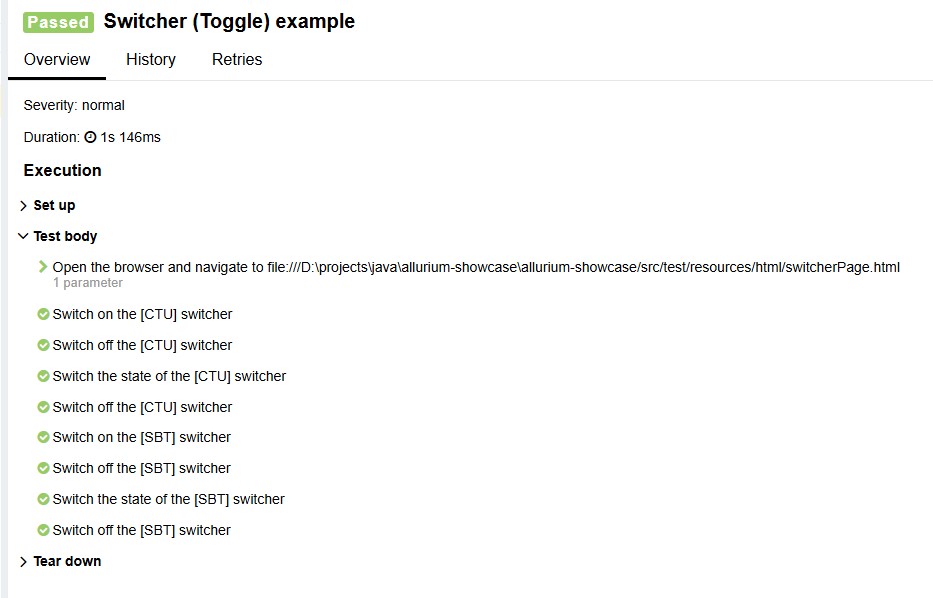
The report displays the element type simply as "switcher" (since we did not override the name via the setUiElementType method).
You can change this if desired by adding setUiElementType('custom type') in the constructor.
For example, like this:
public ClassicToggleSwitcher(String selenideLocator) {
    super(selenideLocator);
    setUiElementType("custom switcher type");
}
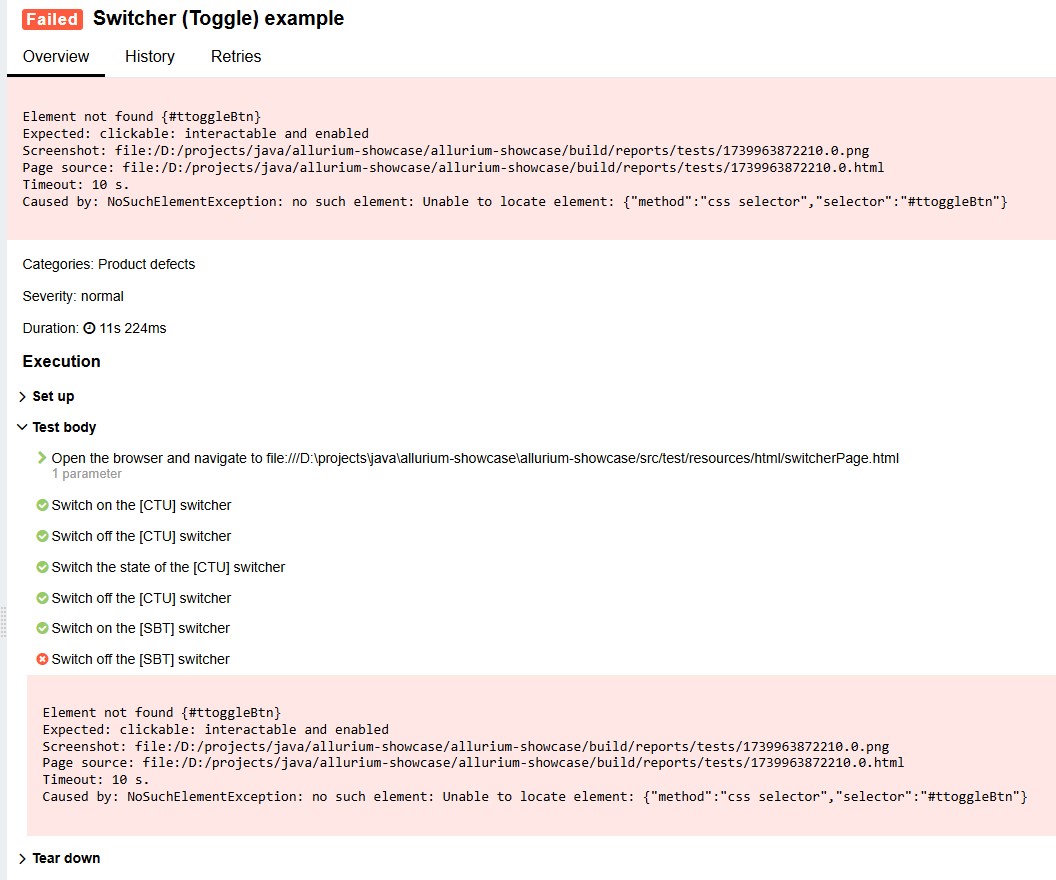
Finally, let's see what the report shows if an error is made. For example, assign an incorrect locator to an element:
@Name("SBT")
protected ButtonToggle buttonToggle = new ButtonToggle("#ttoggleBtn");
Run the test, and the report will show the expected error at the step where the element is called.