Example 11 - Creating Your Own Element
Now we can consider creating our very own custom element.
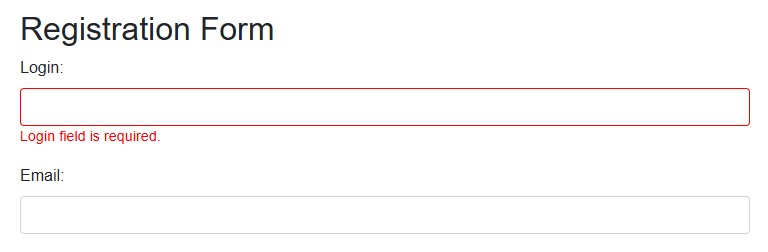
Suppose we need to validate a form where certain fields are mandatory. Such a field is the "Login" field in the form discussed above. In our example, it is required to verify that an empty field, after pressing Submit, displays the message "This field is required." right below the field.
1. Creating the RequiredTextField Class
The first step is to create the RequiredTextField class and inherit from the native TextField class. This way, we gain immediate access to all its properties and the automatically logged steps of the original field.
public class RequiredTextField extends TextField {

    protected By errorMessageLocator;

    // Default constructor is required for creating instances using the '@Locator' annotation
    public RequiredTextField() {
        super();
        setUiElementType("required input text field");
    }

    public RequiredTextField(By rootLocator) {
        super(rootLocator);
        // If a custom type name is not provided, the value "input text field" will be used
        setUiElementType("required input text field");
    }

    public boolean isErrorMessageShown() {
        return getRoot().parent().$(".error-message").isDisplayed();
    }

    @Step("Assert that, the requited field message '{message}' shown")
    public void assertWarningIsShown(String message) {
        Assertions.assertThat(isErrorMessageShown()).as("Requited field message").isTrue();
        Assertions.assertThat(getRoot().parent().$(".error-message").text())
                  .as("Error Message").isEqualTo(message);
    }
}
Declaration in the Form Class
When declaring the element, you can set the locator through the constructor or via the @Locator annotation. For example:
@Name("Login")
protected RequiredTextField fieldLogin = new RequiredTextField(By.cssSelector("#login"));
Or with an annotation:
@Name("Login")
@Locator(css = "#login")
protected RequiredTextField fieldLogin;
The setUiElementType method allows you to override the element type name that will be displayed in the report. If this is not done, the inherited name "input text field" will be used.
When calling inherited steps (for example, write, clear, assertCurrentValue), the report logs the steps, while the new custom assert assertWarningIsShown(String message) is logged via the @Step annotation.
Test Scenario
@Test
@DisplayName("Create custom 'Required' text field")
public void makeNewElementRequitedField() {
    UiSteps.openBrowser(formPageUrl);
    formPage.fieldEmail().write("john.doe@gmail.com");
    formPage.fieldPassword().write("Password12345!");
    formPage.fieldRank().write("10");
    formPage.fieldDate().clearAndWrite("11.11.2011");
    formPage.fieldTelephone().write("199887688");
    formPage.radioBtnMale().click();
    formPage.ddExperience().select("2 years");
    formPage.btnSubmit().click();
    formPage.fieldLogin().assertWarningIsShown("This field is required.");
    formPage.fieldLogin().write("John");
    formPage.btnSubmit().click();
}
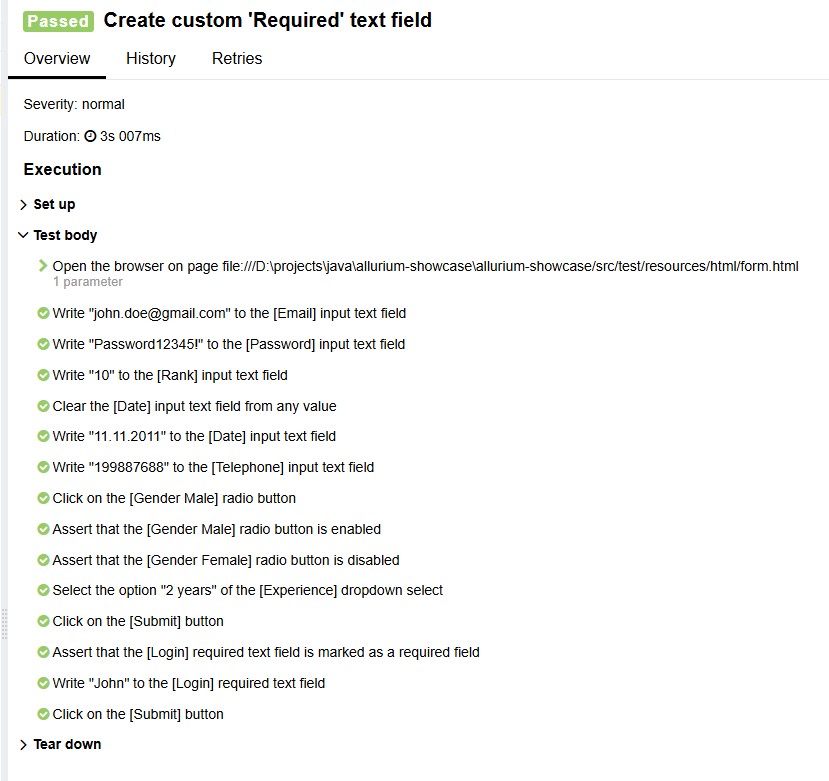
Run the test, wait, and view the report:
Inheritance from AbstractRequiredTextField
Above, we have considered the most universal method of creating a new element by inheriting from an existing one. In addition, the framework provides a set of abstract classes that can be considered as templates for creating custom elements and widgets. Thus, you can create a new element by inheriting from the abstract class AbstractRequiredTextField, which contains a set of abstract methods and already implements partially or almost entirely all necessary logic. An example of such an abstract class:
public abstract class AbstractRequiredTextField extends TextField {

    public AbstractRequiredTextField() {
        setUiElementType(ElementType.REQUIRED_TEXTFIELD.getType());
    }

    public abstract boolean isMarked();

    public void assertMarkedAsRequired() {
        Assertions.assertThat(isMarked()).as("Requited field message").isTrue();
    }

    public void assertNotMarkedAsRequired() {
        Assertions.assertThat(isMarked()).as("Requited field message").isFalse();
    }
}
Create a new class ReqTextField that inherits from AbstractRequiredTextField:
public class ReqTextField extends AbstractRequiredTextField {

    public ReqTextField() {
        super();
    }

    public ReqTextField(String selenideLocator) {
        super(selenideLocator);
    }

    @Override
    public boolean isMarked() {
        return getRoot().parent().$(".error-message").isDisplayed();
    }
}
Now in the test, call the method assertMarkedAsRequired() instead of assertWarningIsShown:
@Test
@DisplayName("Create custom 'Required' text field")
public void makeNewElementRequitedField() {
    UiSteps.openBrowser(formPageUrl);
    formPage.fieldEmail().write("john.doe@gmail.com");
    formPage.fieldPassword().write("Password12345!");
    formPage.fieldRank().write("10");
    formPage.fieldDate().clearAndWrite("11.11.2011");
    formPage.fieldTelephone().write("199887688");
    formPage.radioBtnMale().click();
    formPage.ddExperience().select("2 years");
    formPage.btnSubmit().click();
    formPage.fieldLogin().assertMarkedAsRequired();
    formPage.fieldLogin().write("John");
    formPage.btnSubmit().click();
}
This way, you can very simply create a class for a widget or element specific to each project or its part, while all actions are logged in the report in a clear and detailed manner.